openainamespace: openai
api:
url: https://raw.githubusercontent.com/openai/openai-openapi/master/openapi.yaml
basePath: https://api.openai.com/v1
componentType: OAIComponent31
...namespace: getimg
api:
spec: ./api/getimg.yaml
basePath: https://api.getimg.ai
title: getimghttp_basic' | 'http_bearer' | 'apiKey' | 'oauth2namespace: elevenlabs
api:
url: https://api.elevenlabs.io/openapi.json
basePath: https://api.elevenlabs.io
auth:
type: apiKey
requireKeys:
- id: xi-api-key
displayName: xi-api-key
type: string
in: header
title: elevenlabsnamespace: openai
api:
url: https://raw.githubusercontent.com/openai/openai-openapi/master/openapi.yaml
basePath: https://api.openai.com/v1
componentType: OAIComponent31
auth:
filter:
operationIds:
- createChatCompletion
- createCompletion
- createImage
- createModeration
- createTranscription
- createTranslation
- createImageVariation
- createImageEdit
- createEdit
- listModels
- createEmbedding
title: openaicategory: Text-to-Speech
description: >-
Text to Speech Synthesis using the ElevenLabs API, supporting a variety of
monolingual (english) and multilingual voices.
meta:
source:
title: 'ElevenLabs: Text To Speech'
links:
Website: https://beta.elevenlabs.io/speech-synthesis
Subscription: https://beta.elevenlabs.io/subscription
API Reference: https://docs.elevenlabs.io/api-reference/quick-start/introduction
Documentation: https://docs.elevenlabs.io/welcome/introduction
Voice Lab: https://beta.elevenlabs.io/voice-lab
summary: >-
Text to Speech Synthesis using the ElevenLabs API, supporting a variety of
monolingual (english) and multilingual voices.
title: Text To Speech
apiNamespace: elevenlabs
apiOperationId: Text_to_speech_v1_text_to_speech__voice_id__post
displayNamespace: elevenlabs
displayOperationId: simplettsscripts:
hideExcept:inputs:
- prompt
- temperature
- model
- top_p
- seed
- max_tokens
- instruction
- images
hideExcept:outputs:
- textscripts:
transform:inputs:
transform:outputs:scripts:
hoist:inputcontrols:
preview:
type: AlpineImageGalleryComponent
displays: output:image
opts:
readonly: trueplaceholder?image:
customSocket: imagesocketOpts:
format: base64socketOpts:
format: base64_withHeadersocketOpts:
array: trueallowMultiple: trueinputs:
'n':
title: Number of Images model:
type: string
customSocket: text
choices:
block: getimg.listModels
cache: global
args:
pipeline: face-fix
family: enhancements
map:
title: name
value: idmessages:
scripts:
jsonata: >-
[{"role":"system", "content": $string(instruction) }, {"role":"user",
"content": $string(prompt) }]
delete:
- prompt
- instruction
hidden: truesecuritySchemesoutputs:
_omni_result:
hidden: trueimage_strength:
scripts:
jsonata: >
$exists(init_image_mode) and init_image_mode = "IMAGE_STRENGTH" ? image_strength : undefined
step_schedule_end:
scripts:
jsonata: >
$exists(init_image_mode) and init_image_mode = "STEP_SCHEDULE" ? step_schedule_end : undefined
step_schedule_start:
scripts:
jsonata: >
$exists(init_image_mode) and init_image_mode = "STEP_SCHEDULE" ? step_schedule_start : undefinedAccept:
hidden: true
default: application/json
Organization:
hidden: trueimage:
customSocket: file OAIBaseComponent.import { OAIBaseComponent, WorkerContext, OmniComponentMacroTypes, Composer } from 'mercs_rete';let component = OAIBaseComponent
.create(NS_ONMI, "redactPll")
.fromScratch()
.set('title', 'PII Redaction')
.set('category', 'Compliance')
.set('description', 'Redact Personal Information from text')
.setMethod('X-CUSTOM')
.setMeta({
source: 'summary',
summary: 'A PII redactor built using the solvvy/redact-pii library, implementing regex based PII reduction along with support for Google Cloud',
links: {
'What is PII?': 'https://www.cloudflare.com/learning/privacy/what-is-pii/',
'redact-pii github': 'https://github.com/solvvy/redact-pii',
'google cloud DLP': 'https://cloud.google.com/d1pr',
'Solvy': 'https://www.solvvy.com/'
}
});const inputs = [
{ name: 'text', type: 'string', description: 'A string', customSocket: 'text' },
// More input definitions...
{ name: 'usSocialSecurityNumber', type: 'boolean', default: true }
];
inputs.forEach(({ name, type, customSocket, description, default: defaultValue }) => {
component.addInput(
component.createInput(name, type, customSocket)
.set('description', description)
.setDefault(defaultValue)
.toOmniIO()
);
});supports:
- "blocks:v2"export default {
hooks: extensionHooks,
createComponents: () => {
blocks: [ /*array of OmniComponentFormat*/ ],
patches: [ /*array of OmniComponentPatch*/ ]
}
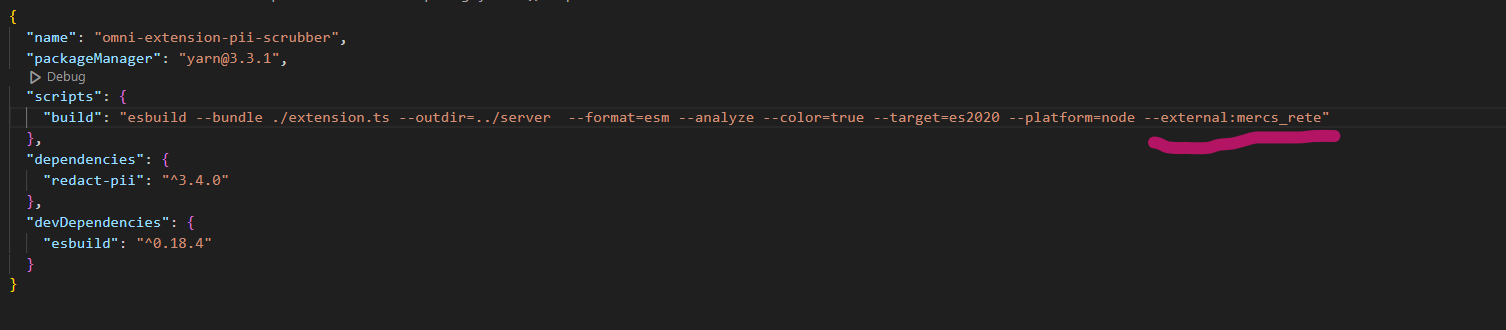
}yarn buildimport { OAIBaseComponent, type OmniComponentFormat, WorkerContext, OmniComponentMacroTypes } from "./path_to_file"const NS_OMNI = 'your_namespace'
let component = OAIBaseComponent.create(NS_OMNI, 'your_operationId')component
.fromScratch()
.set('description', 'Your description')
.set('title', 'Your title')
.set('category', 'Your category')
.setMethod('Your Method')
.setMeta({
source: {
summary: 'A standard text input component with built-in URL fetching, enabling it to be connected to File (Image/Audio/Document) sockets',
authors: ['Mercenaries.ai Team'],
links: {
'Mercenaries.ai': 'https://mercenaries.ai'
}
}
})const partialComponentFormat: Partial < OmniComponentFormat > = {
displayNamespace: 'your_display_namespace',
displayOperationId: 'your_display_operationId',
apiNamespace: 'your_api_namespace',
apiOperationId: 'your_api_operationId',
// other properties can be added as needed
};
component.fromJSON(partialComponentFormat)const input = component.addInput(
component.createInput('input_name', 'input_type', 'input_x-type')
.set('title', 'Input title')
.set('description', 'Input description')
.setDefault('default value')
.setConstraints(min value, max value)
.setChoice([])
.setRequired(true)
.allowMultiple(true) // enable an input to accept multiple connections.
.setControl({
controlType: 'alpine control type'
}) // Override the automatically selected control
.toOmniIO()
);component.createInput('input_name', 'input_type', 'input_x-type', {array:true}){array: true, customSettings: {array_separator = '-------' }};const inputs = [
{ name: 'text', type: 'string', description: 'A string', customSocket: 'text' },
// More input definitions...
{ name: 'usSocialSecurityNumber', type: 'boolean', default: true }
];
inputs.forEach(({ name, type, customSocket, description, default: defaultValue }) => {
component.addInput(
component.createInput(name, type, customSocket)
.set('description', description)
.setDefault(defaultValue)
.toOmniIO()
);
});let controlComposer = component.createControl('controlName')
component
.addControl(
controlComposer
.setRequired(true)
.setControlType('alpineControlType')
.toOmniControl()
);component.addControl(
component
.createControl("controlName")
.setRequired(true)
.setControlType("alpineControlType")
.toOmniControl()
);component.setMacro(OmniComponentMacroTypes.EXEC, (payload: any, ctx: WorkerContext) => {
// define your function here
})const YourComponent = component.toJSON()
export default YourComponentapp.blocks.addBlock(component)let patch= OAIBaseComponent
.createPatch(NS_ONMI, "text_replace")
.fromComponent(apiNamespace, apiOperationId)
....
.toJSON() //<-- OmnicomponentPatch
app.blocks.addPatch(patch)component.dependsOn(['automatic1111.interrogateapi_sdapi_v1_interrogate_post', 'automatic1111.simpleImage2Image']);