Run Recipe via REST API

This provides instructions on how to execute Omnitool recipes through the REST API, enabling seamless integration into your system.

1. Preparing a JWT Token

To generate a JWT token, use the provided script with the following syntax:

/generateJwtToken <action> <subject> <expires_in> [<recipe_id> (optional)]
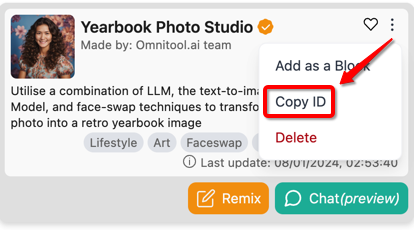
Parameters

  • <action>: String parameter for the intended action (use exec for running recipes).

  • <subject>: String parameter specifying the JWT subject, typically the recipe to execute.

  • <expires_in>: Integer parameter for the token's validity in milliseconds.

  • <recipe_id>: (Optional) Unique ID of the recipe.

Example

Generate a JWT for a recipe execution with 1-hour validity by running the command in Omnitool chat window:

/generateJwtToken exec Workflow 3600000

Output

The script outputs a JWT for use in API request headers.

Security Considerations

  • Ensure JWT security to prevent unauthorized recipe access.

  • Use secure connections for API interactions.

  • Rotate tokens regularly and prefer short expiration times.

Troubleshooting

If you encounter authorization issues, verify the JWT's expiration, correct header setup, and parameter accuracy.

2. Executing a Recipe

With your JWT, make a POST request to the recipe execution API, including the JWT in the Authorization header.

Endpoint

POST http://127.0.0.1:1688/api/v1/workflow/exec

Header

Authorization: Bearer <token>

<token> is the JWT acquired from the /generateJwtToken script.

Curl Example

To make the request using curl, you would use the following command, replacing with your actual JWT:

curl -X POST http://127.0.0.1:1688/api/v1/workflow/exec -H "Authorization: Bearer <token>"

Request Body

{ "workflow": "<recipe_id>", "args": {} }

The args parameter acts as a input container for executing recipes, capable of passing various data types to the Chat Input as a starting block. These data types include images, text, audio, video, documents, and even structured JSON objects.

{
    "workflow": "<recipe_id>",
    "args": {
        "text": "Example text",
        "images": "http://example.com/image.png"
    }
}

Supported Image Formats

When using images in the args parameter, our system is compatible with various formats, such as GIF, PNG, JPG, and WebP. For APIs with specific format requirements, utilize Sharp's 'Prepare Image' block within your recipe to convert and comply with these constraints.

Response

Upon success, the API will initiate the specified recipe. You will receive a JSON response containing details about the recipe's execution status, including any outputs or errors.

{ "result": { "status": "JOB_STARTED", "jobId": "bd999ed9-f2af-49cf-b8e1-fd9c3d2a5425", "sender": "omni" } }

3. Retrieve the Recipe Results

Adding Recipe Output Block
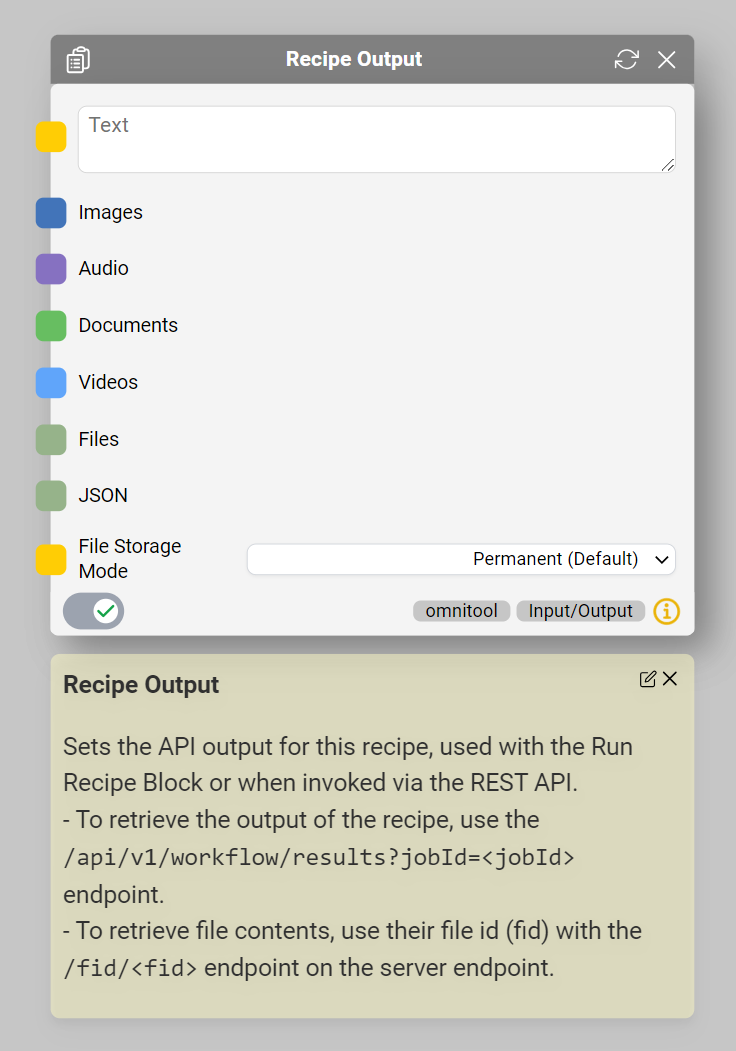
Ensure that your recipe includes the 'Recipe Output' block for proper execution and result retrieval.

Accessing Execution Outputs

Once a job is finished, retrieve results with:

curl -X GET http://127.0.0.1:1688/api/v1/workflow/results?jobId=<job_id> -H "Authorization: Bearer <token>"

Refer to examples/api.mjs for a end-to-end sample JavaScript implementation.

Last updated